DIY Library Ladder
- ProjectAddict

- Jun 8, 2023
- 4 min read
Updated: Jun 9, 2023

This project started like most projects do for me, rummaging through our detached garage's wood stash to see what we have on hand. I loath spending money, so anytime I can use what I already have is a huge win! After some research of library ladders, I was dissatisfied with the recommendations I saw to use 1x4s for the vertical support. In my option, that would not be sturdy enough for my peace of mind. I went with 2x4x8 prime white wood and am very pleased with the result. All the materials and tools can be purchased at your local Home Depot. As usual, make sure you are choosing the straightest boards with the fewest imperfections. That will save you a ton of work on the back end.

The very first thing we did was decide the best angle. My library ladder hardware kit that I ordered from Amazon (here) recommended a 12 degree angle.

Once we decided on the appropriate height for the ladder, I used my small miter saw to cut both the top and bottom to the same angle, then mirrored that for the second 2x4.

We did not want the sides to resemble a plain 2x4 so we trimmed them to exactly 3". If you do not plan to router the edges, then I suggest trimming both ends to match the same square edge, as opposed to one cut edge and one standard beveled edge.

We spaced our rungs 12" on center. You can modify this to your preference. We simply went off the step ladders we had on hand.

Using a Speed Square is the easiest way to make sure you get a perfectly centered mark. Since we trimmed the board down to 3", our center point was 1 1/2".

Take your 1 1/4" spade bit and make sure you are perfectly aligned on your center mark before drilling. If you are off even a little, it can be obvious. I made a mark on my bit at 1/2" depth so that all the holes would be the same.
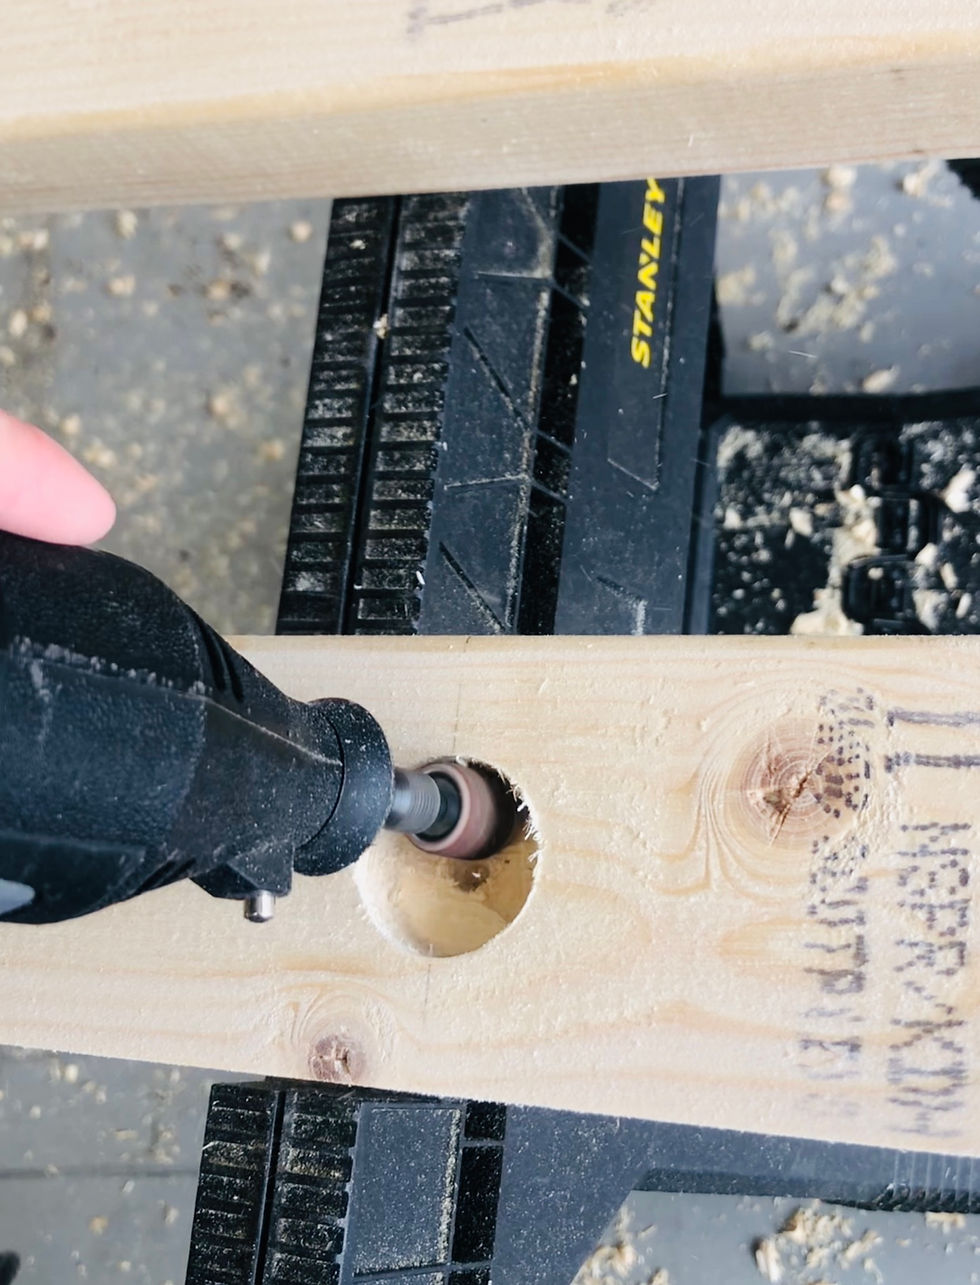
This step was not necessary, but we wanted to make sure our dowels went in smoothly and that all the rough edges were sanded away so we used the sanding bit on our Dremel.

We chose a rounded edge bit for our router and were really pleased with the clean edge it gave us.

This is my favorite wood glue that I use for most of my projects. Avoid putting too much in the drilled holes to prevent a mess.

We cut our dowels down to 11 3/4" lengths, which got us four rungs out of each dowel. Adjust your length to how wide you want your ladder. The more hands you have when putting all the rungs in, the better. The glue can make a mess, so laying down cardboard beneath would be ideal. I wish we had been able to record us putting it all together, as it was quite comical! We continuously checked for glue drips and wiped them up with a wet paper towel.

Since we knew we would be patching, sanding, and painting, I was okay with driving an ugly screw into the side. However, if you plan to stain, I highly recommend getting some nice screws and drilling a hole to sink the screw flush into the wood.

Using white wood 2x4s, does come with a price of a lot of patching. We like the challenge though! Patch N Paint Spackling will be your new best friend.

Once the Spackling is completely dry, use your 120 grit sand paper to even everything out. The lower the number, the more of the surface you will be taking off.

We then switched to a higher grit (220) and made several passes until it was exactly like we wanted.

On bare wood, I usually prime with Kilz before painting, but this time I cheated and used a paint and primer in one. It only took two coats to get the perfect coverage.

Last, I applied a water-based polyurethane over the top to prevent scratches and scuffs. It also makes the surface smoother and you won't have any of the sticky paint feel. I recommend doing two coats, with a light sanding in between. The frustrating part is waiting 24 hours between coats.

After attaching the hardware, my son and I surprised my daughter with the finished product!

A library bedroom has been her dream for years! It was exciting to finally make it happen! All in all, the ladder took only a few hours total to build. Since I already had most of the supplies on hand, it only cost me $12. Library ladder kits can be upwards of $100, so every little bit you can save is a bonus!

This easy project was worth every second so my daughter can live out all her Belle inspired dreams 💗!
Materials Needed:
2x4x8 - 2
1 1/4" Dowel Rod - 2 (cut into 11 3/4” pieces)
Tightbond Premium Wood Glue
3” Screws
Patch N Paint Spackling
Paint & Primer Combo
Polyurethane (water-based)
Elbow Grease
Tools Used:
Miter Saw
Table Saw
Router
Drill
1 1/4" Spade Bit
Putty Knife
Sander
Sandpaper (120 grit, 220 grit)
T-Bevel Angle Finder
Speed Square
Dremel w/ Sander Bit
Common Sense


Comments